What is a node?
Nodes are the basic building blocks of a NodeSpell project, each node either creates something or modifies something. Data flows across nodes through connections between them.
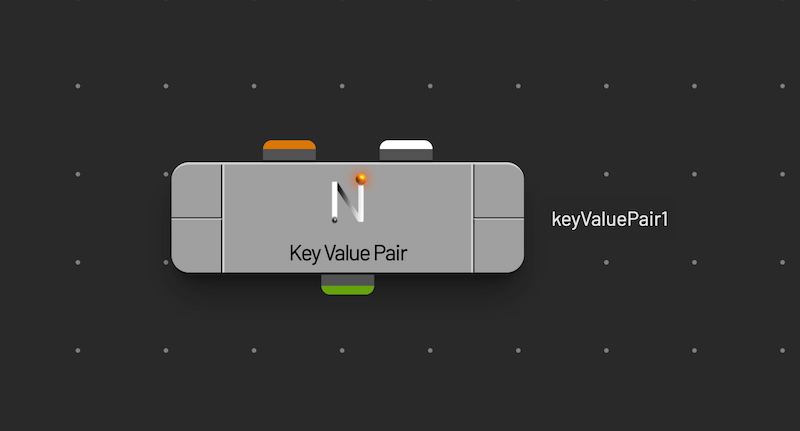
On the node body you will see basic information about the node, in the centre there is the icon, and below that is the type of the node.
There are many types of nodes provided by NodeSpell officially, and users can also create their own types of nodes too.
Right clicking on the node brings up a context menu with actions you can perform on the node, if you want to know more information about the node, selecting the Help option will bring up the documentation of the node.
Node Buttons
On both sides of the node you can see 4 corner buttons, they are:
- bypass(top-left): this is for bypassing the node, if a node is bypassed, the first input connection will be passed down the node graph.
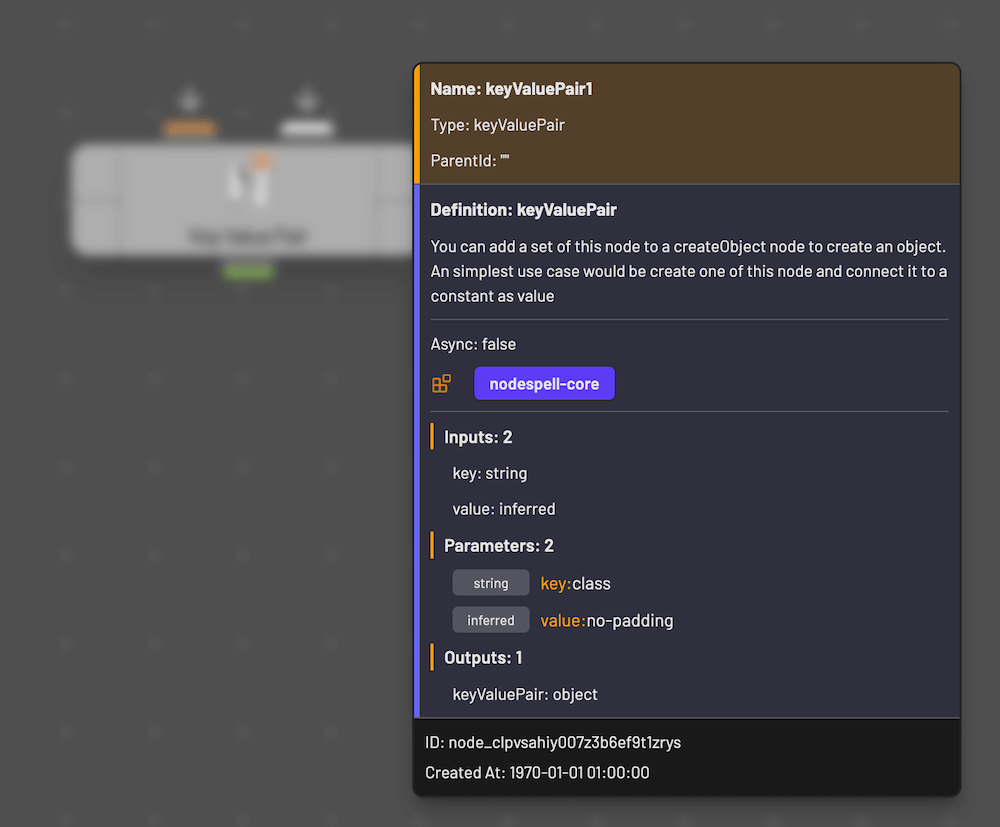
- info(top-right): the info button brings up a floating window that shows detailed information about the node.
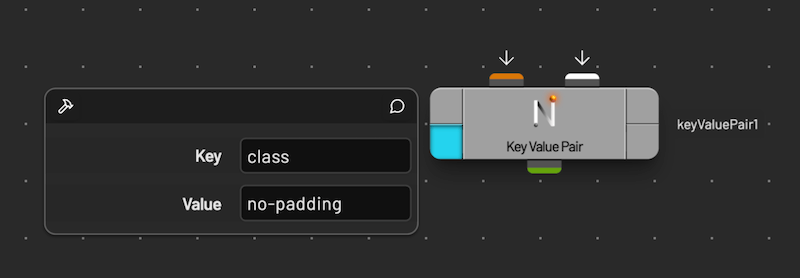
- parameters(bottom-left): brings up a floating parameter editor for quickly changing and inspecting parameter settings of the node.
- preview(bottom-right): brings up a floating preview panel, the data output by the node will be rendered in the preview panel, if it's of certain types that can be rendered(mostly HTML elements).
Node Names
There is a name tag to the right of the node, you can rename the node by directly clicking on it. Names are unique on the same level, similar to files have unique names in a folder, in fact, the relationship between nodes and levels can be considered as files and folders in a typical file system.
If there is a name clash, the last modified node's name will be append a number until there's no conflicts any more.
Parameters
Each node holds any number of parameters, if you have a parameter editor panel open(not the floating one attached to the node on the node graph), it will show the parameters of selected nodes.
You can set the parameter values directly there.
If more than one node are selected, it'll display the parameters of last selected node, parameters that share the same names will be highlighted with orange overlay, you can set parameters of multiple nodes this way.
Expressions
Parameter can be set literal values("abc", 123, true or false), as well as expressions, which when evaluated, returns literal values.
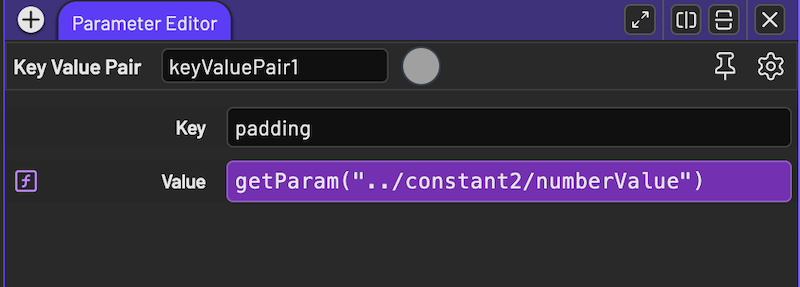
You can toggle if a parameter is using literal value or expression as input type, by right clicking on the parameter name. When a parameter is in expression mode, a purple colour overlay is displayed on the parameter name.
In expression mode, double clicking on the parameter label evaluates the expression and a brighter purple colour is displayed under the evaluated results.
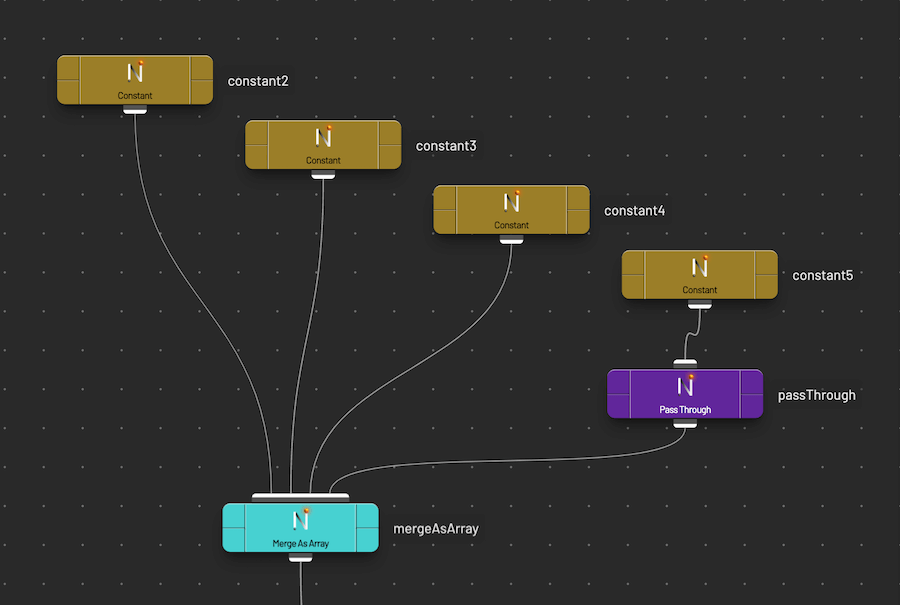
Connections
You can make a connection by dragging from and to the sockets on the top and bottom of nodes. Double clicking on a connection disconnects it.
Some nodes, such as mergeAsArray, mergeHtmlElements, allows multiple numbers of input connections, they look much longer than a regular socket, which can only take one input connection.
If you wire in 2 connections into single sockets, the original connection will be replaced with the new one.
The sockets are colour coded based on the type of data they expect, some node enforce the matching of data type strictly, while others can handle data mismatch. There are no set rules for this, as users can create their own node with specific logic.
However, you should try to match the data type, as a mismatch normally means they are connected incorrectly.
You can hover on the sockets and see extended information about the inputs and outputs.
Levels
Level nodes are special, they don't provide any functions or generate anything on their own, they are more like folders. You can go inside by double clicking or pressing enter while the level node is selected.
Levels by default don't provide any inputs or outputs, they are dynamically generated by levelInput and levelOutput nodes.
You can treat levels as groups but hidden on the upper level, if you have a lot of nodes in the graph, level nodes can make it easier to manage your nodes.
However, be careful when you move nodes inside and outside of levels, their names might be changed if there's a conflict, and expressions set on the parameters can be pointing to the wrong place.
For more details, refer to How to use levels.